

When we start to developing GHAMMY harm/pitch-shifter, we need solution to control it with pedal.
Just bought cheap and very nice midi Expression pedal (Nektar NX-P price: $19.99). But this pedal is MIDI and have 1/4″ Jack cable.
If you have some hardware in setup, just try to find any device with Expression input port. In my situation, I find that Novation Supernova II rack, include Expression input. Just connect it and work into Reason thru Midi channel from my UB Midi Interface. Just try to find Expression input in you Midi Keyboards and controllers, some hardware synths..
Not find in your setup Expression pedal Input??? Don’t worry! And there we start!
You can build very fast and easy your own:
a) Expression Pedal MIDI -> USB Converter
b) Add to this converter box some controllers.
When I start to search now to convert Midi Expression -> USB, I found some solutions, that have big price. But, ARDUINO (also for beginners) – is a real help. And now I think that every musician can customise own setup of controllers and converters.
What we need:
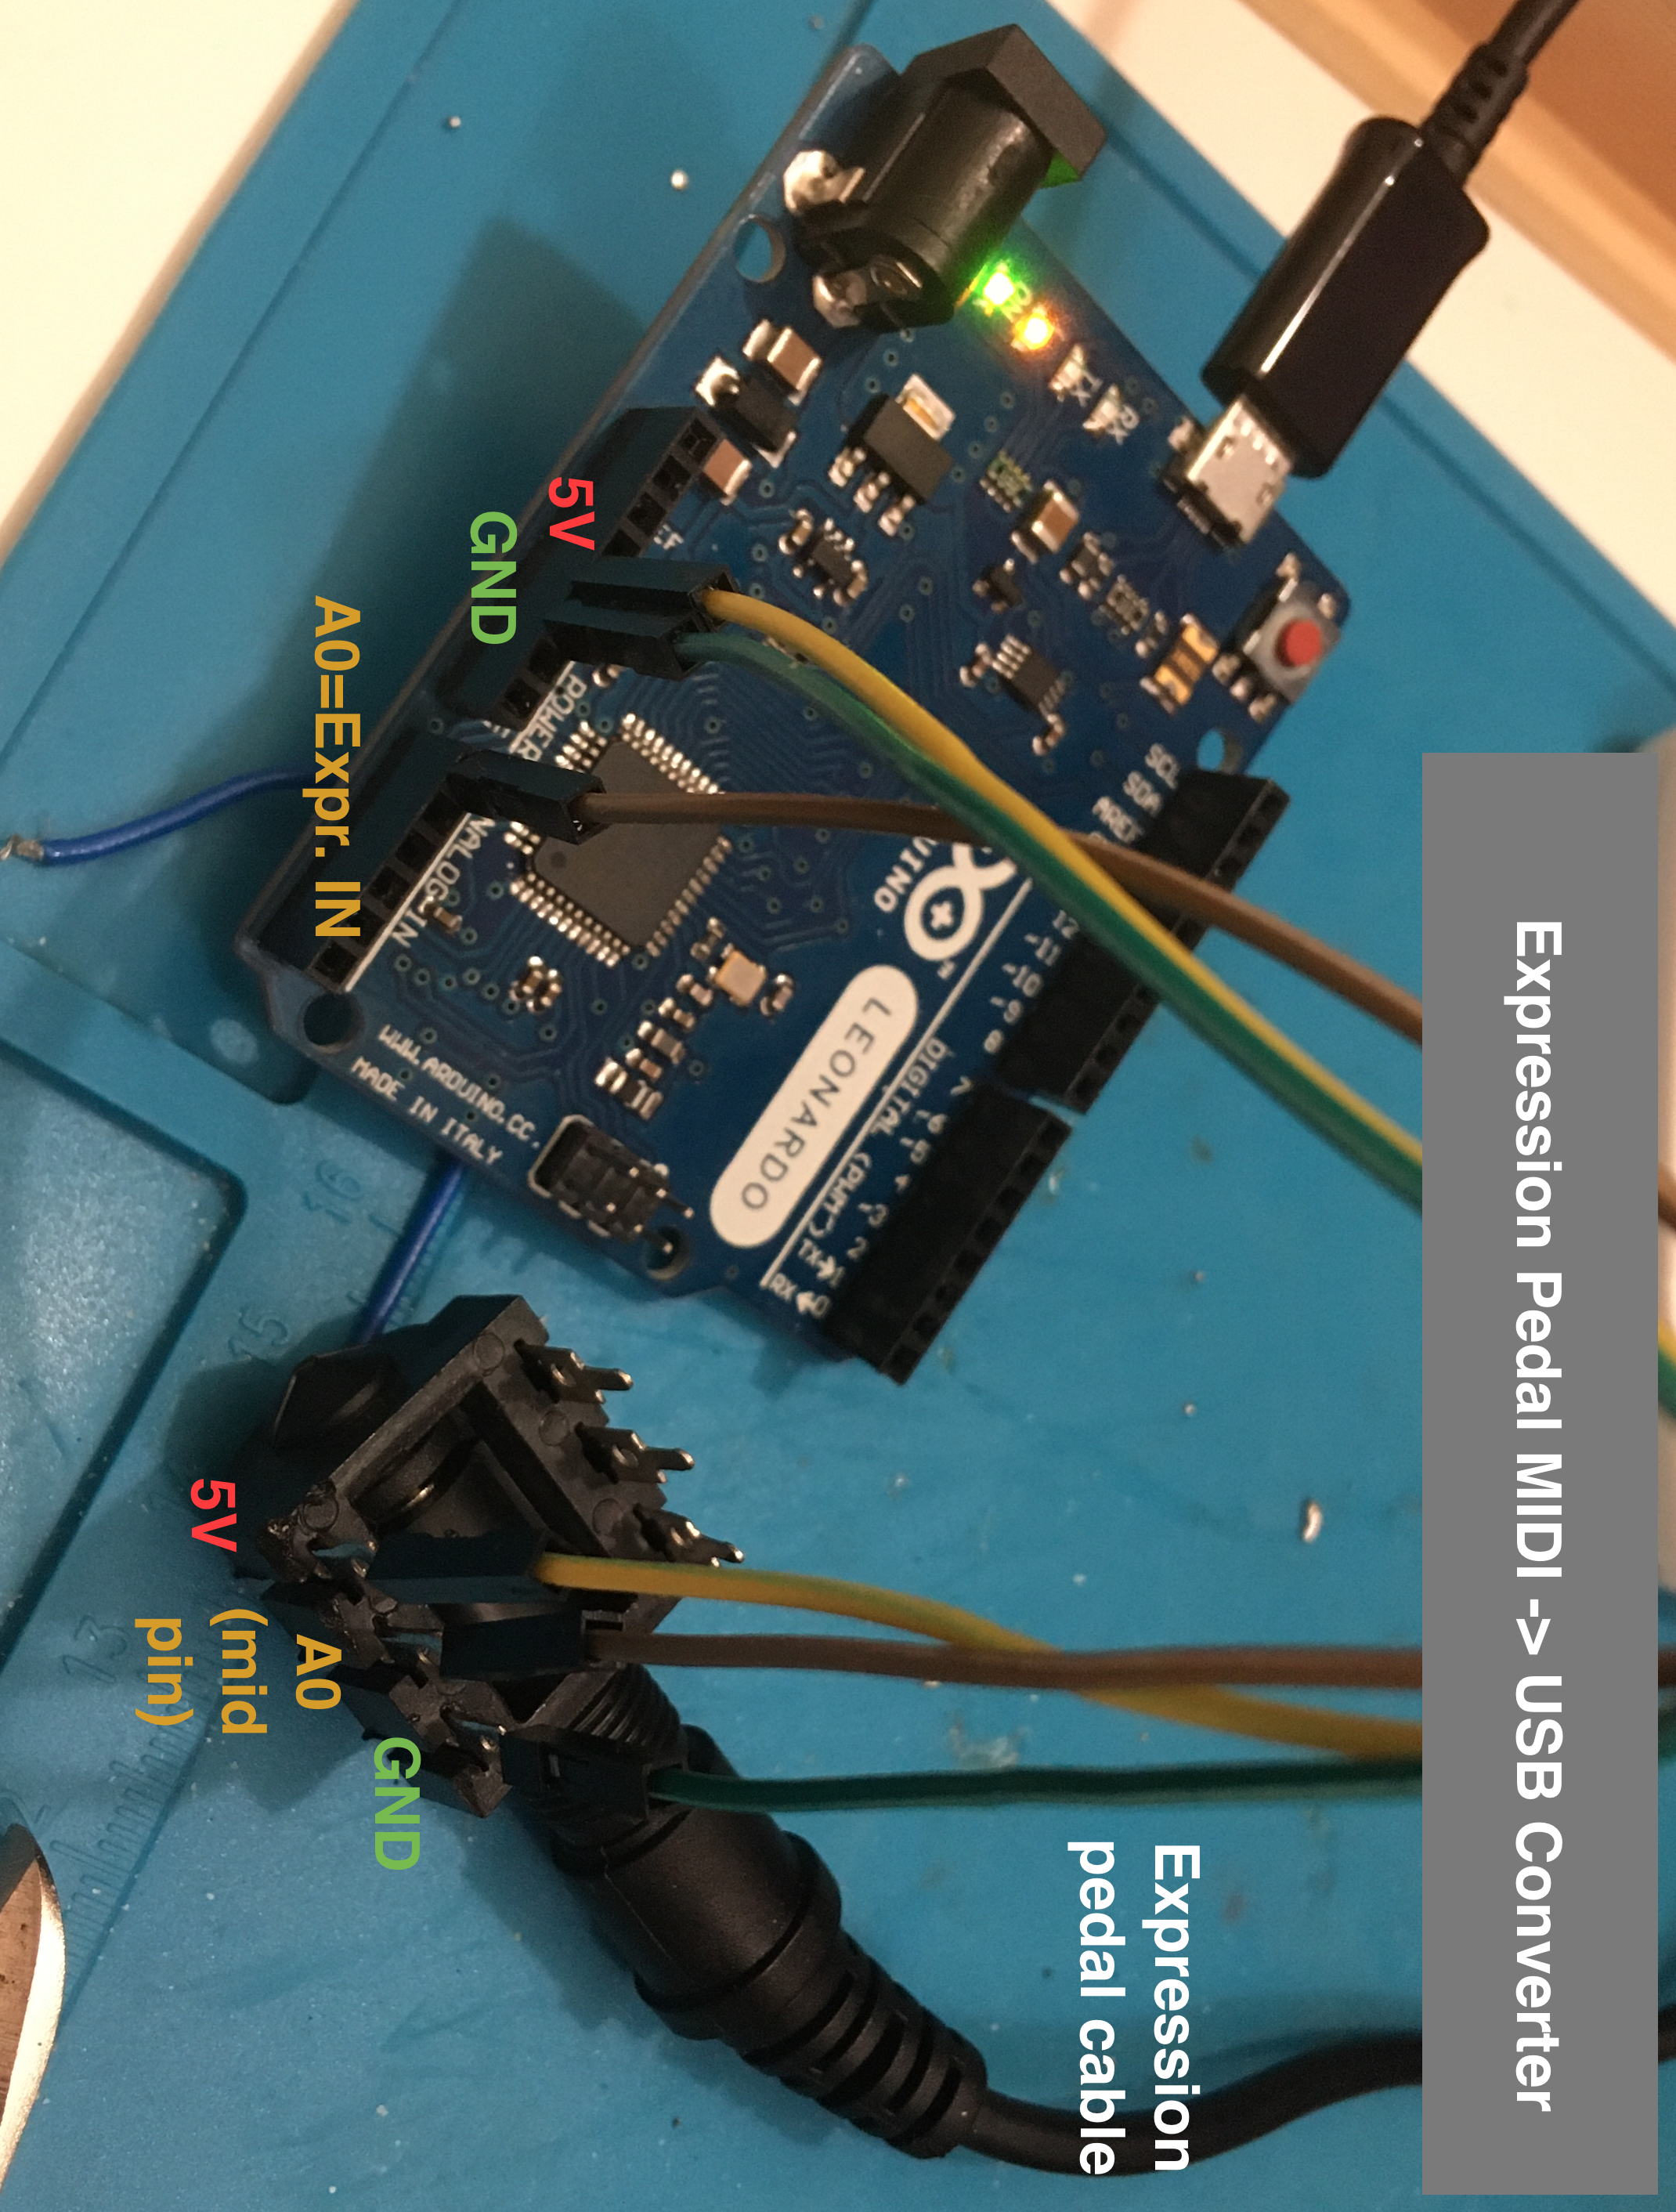
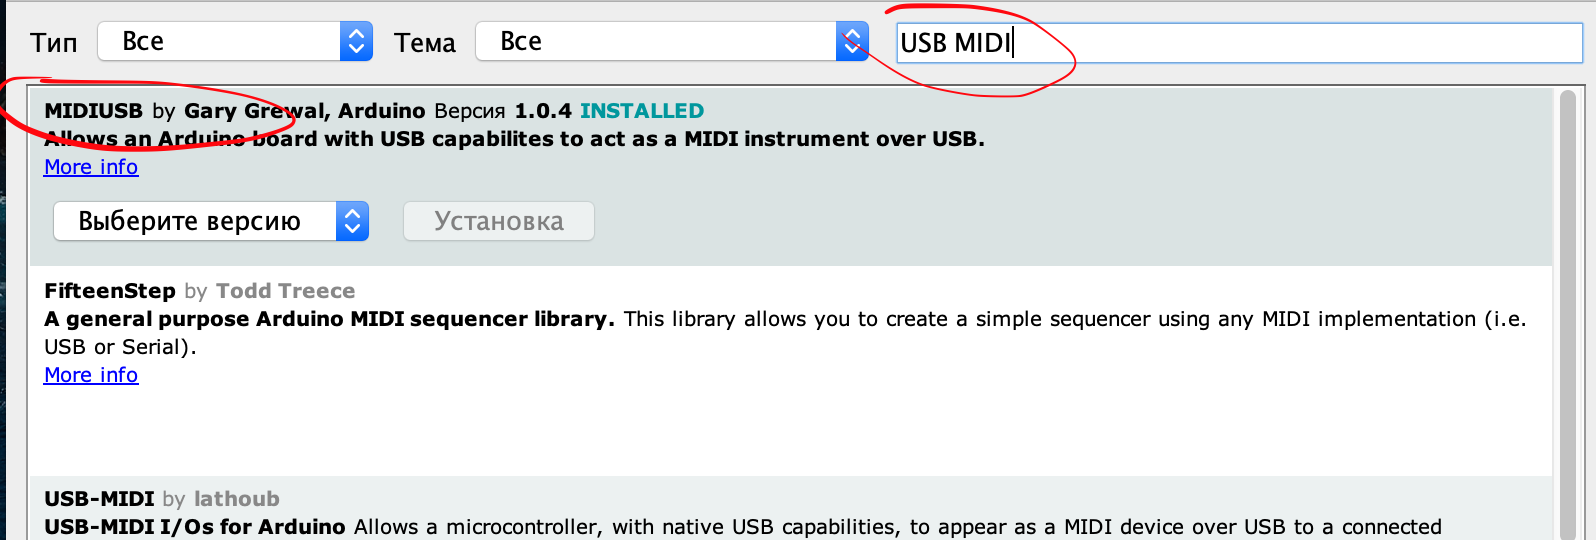
1. ARDUINO (that support MIDI library): DUE, Leonardo, Micro as example (UNO not support MIDIUSB library!!!). Its cheap (I bought Leonardo about $10).
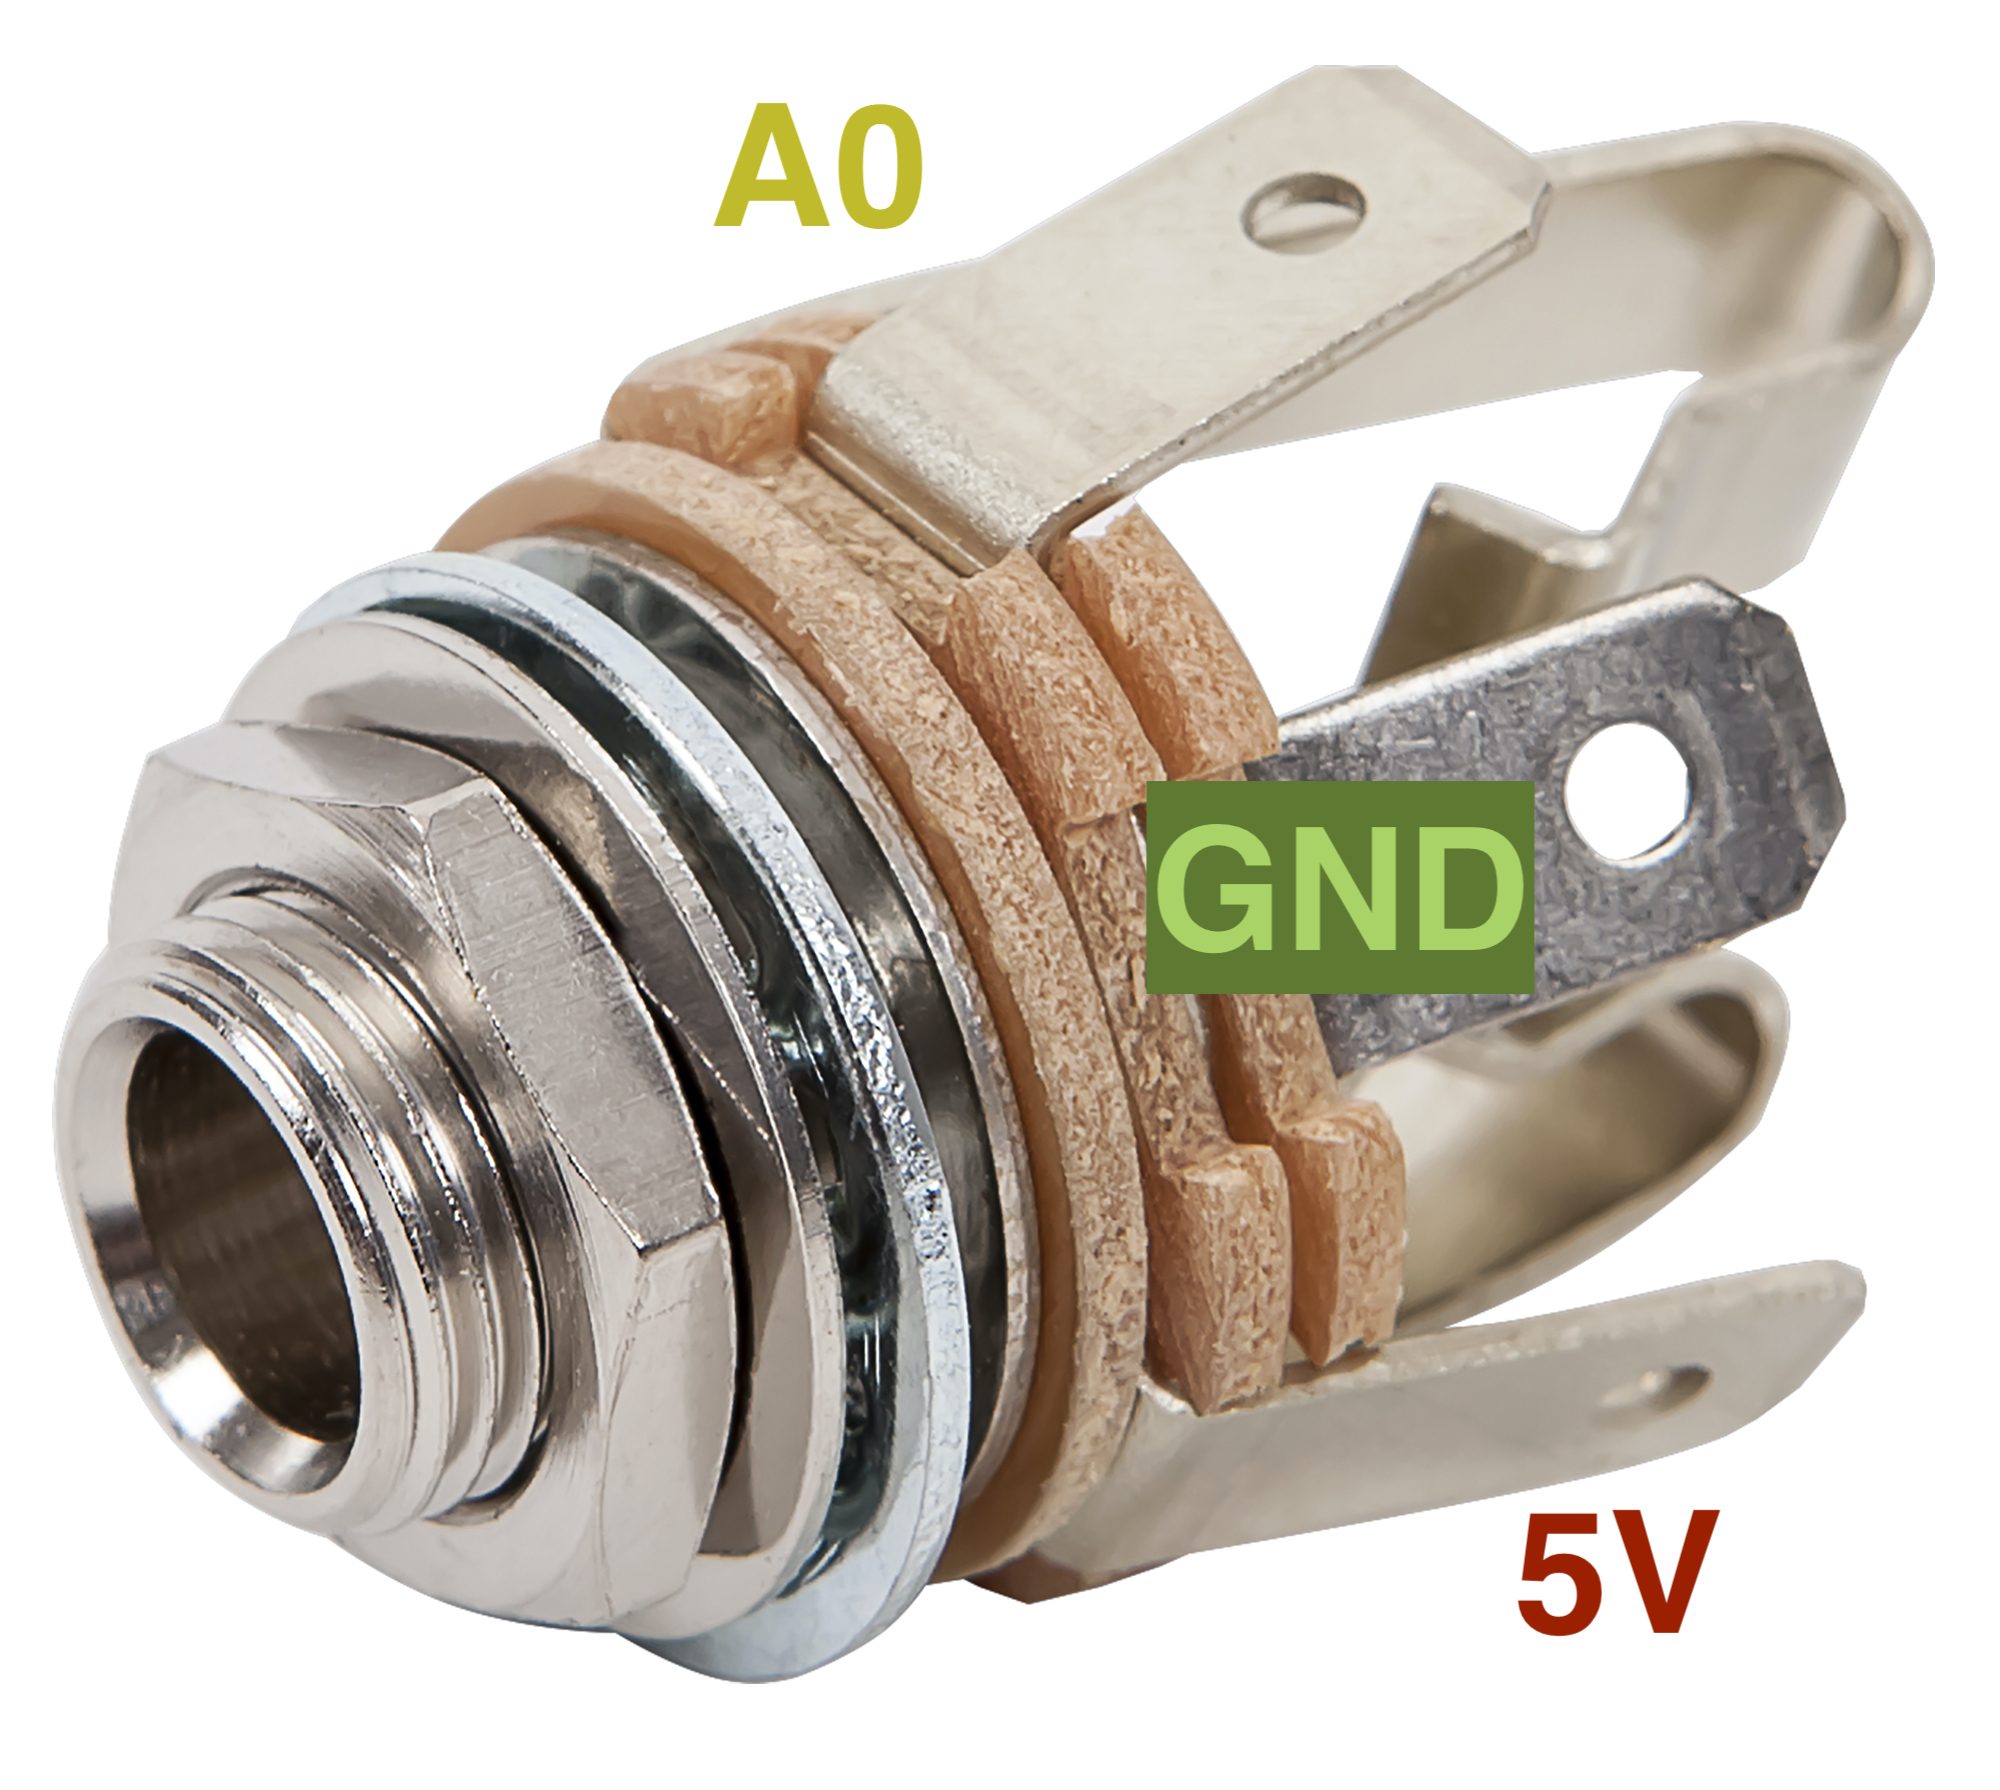
2. Stereo Input 1/4 connector (stereo, because expression pedal have stereo jack)
3. Any box
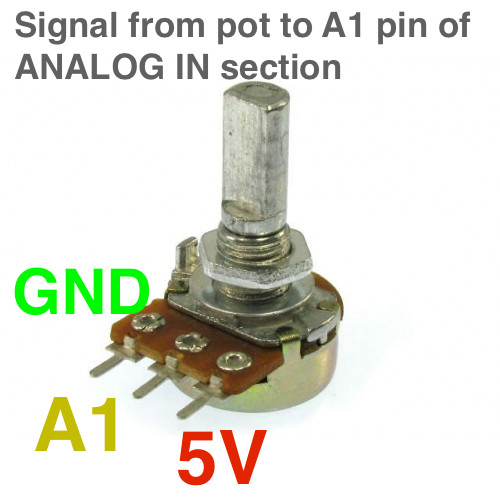
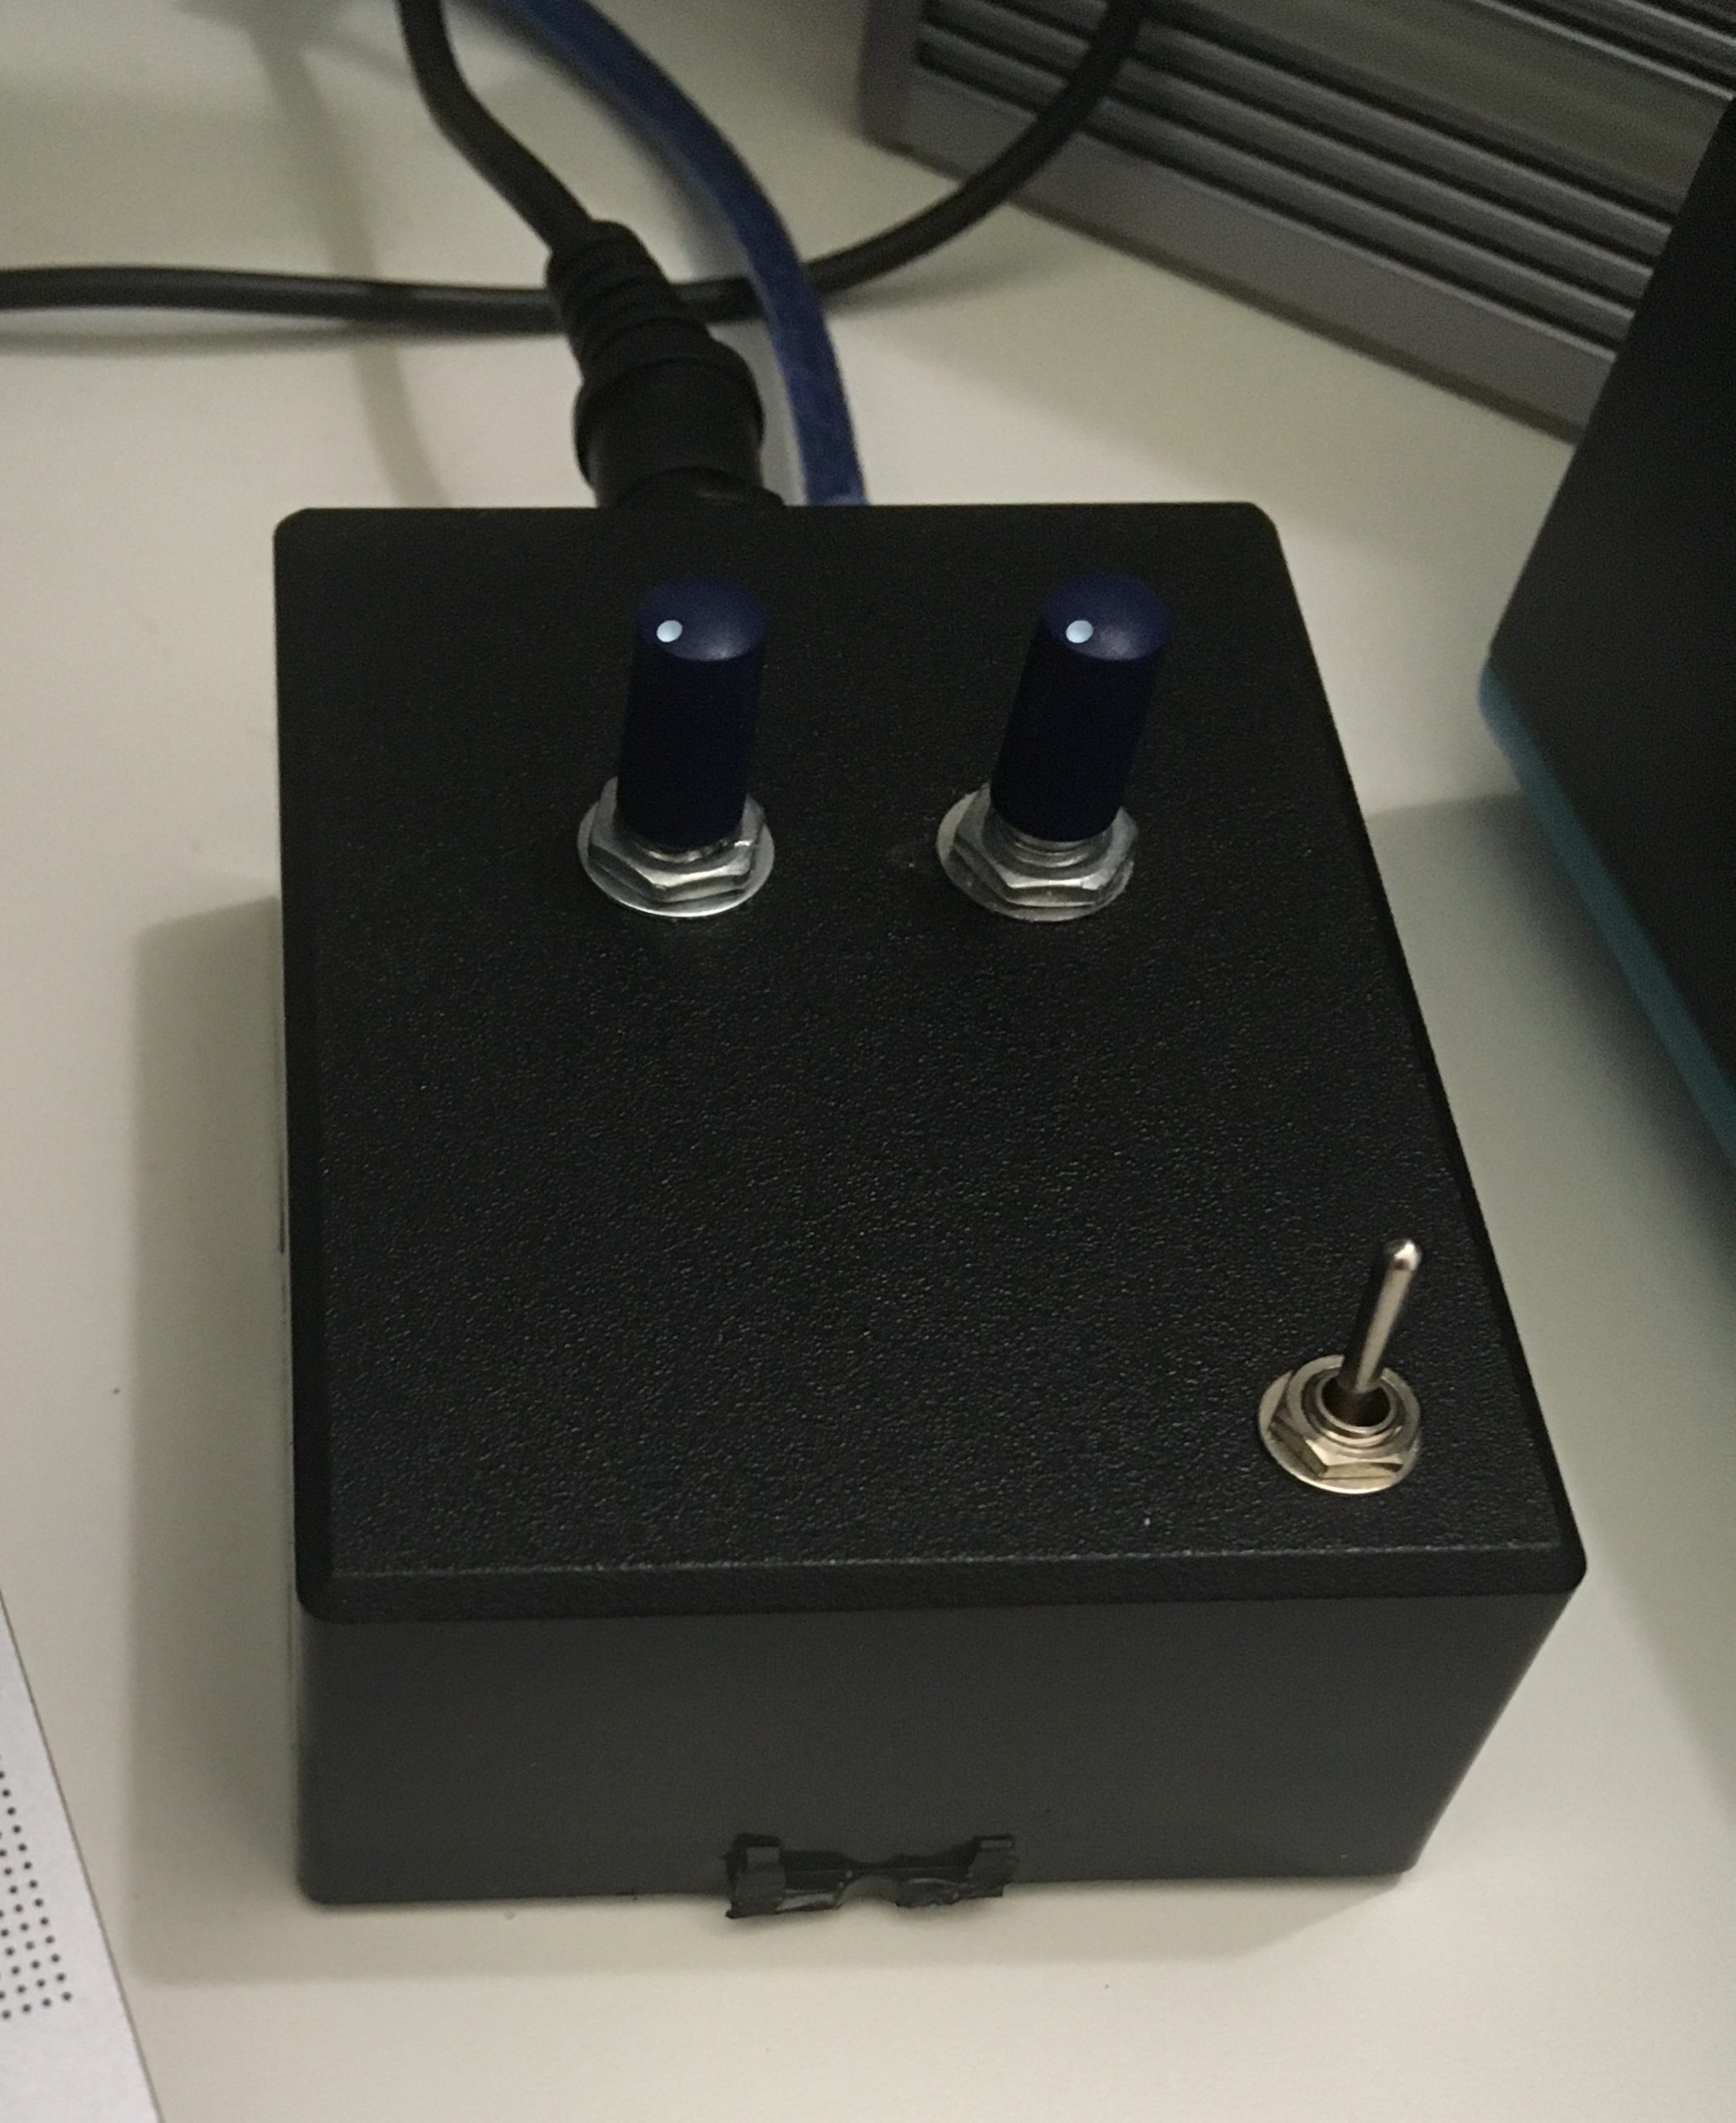
4. Some needed controllers (if you interesting to add midi controller possibility to the box). Im personally add to small box: 2 Pots (linear b10k), knobs for them, 1 switch (ON-ON with triple pins). Of course you can use more controllers, include buttons, faders, pedal switchers, photoresists.. etc.
5. Some wires. Good to buy non-soldering wires with Mother/Father pins.
6. Soldering kit.
Idea based on DIY project created by KUASSA (simple converter for Expression pedal to USB port, that include SPDT switcher):
https://www.kuassa.com/diy-tutorial-how-to-build-arduino-based-expression-pedal-for-efektor-wf3607/
Im just add 2 POTs, and change 3PDT switcher to SPDT switcher. You can customise this project for own needs.
START BUILD:

3. Now we practice to add 2 pots for our box.
This is our small midi controller for own needs (Not need controllers? Go to section about Arduino IDE).. Or just add pots, buttons, faders, etc to your box.
Add 2 Pots (linear b10k). Pots have 3 pins (5V, GND and Signal line). Signal lines for two our pots at Arduino side – ANALOG IN (A1 and A2, because A0 already connected for Expression input). 5V and GND we also connects as previously in POWER section to 5V/GND.
4. SWITСH: Im prefer small but usable SPDT switcher with 3 pins (its cheap). Later in the same way add buttons if you need. For swithchers, buttons – you must use at ARDUINO – DIGITAL (PWM) pins.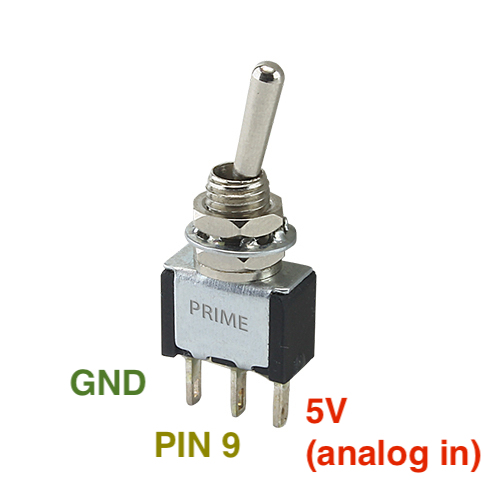
5. If needed – add more pots (faders), may be buttons (like we add switch) in the same way.
6. Prepare your box. Drill holes, and fix switch, pots, Expression input. Box is ready!!!
8. If your Arduino include reset button, press it. Disconnect your ARDUINO (your ready box) and reconnect usb cable.
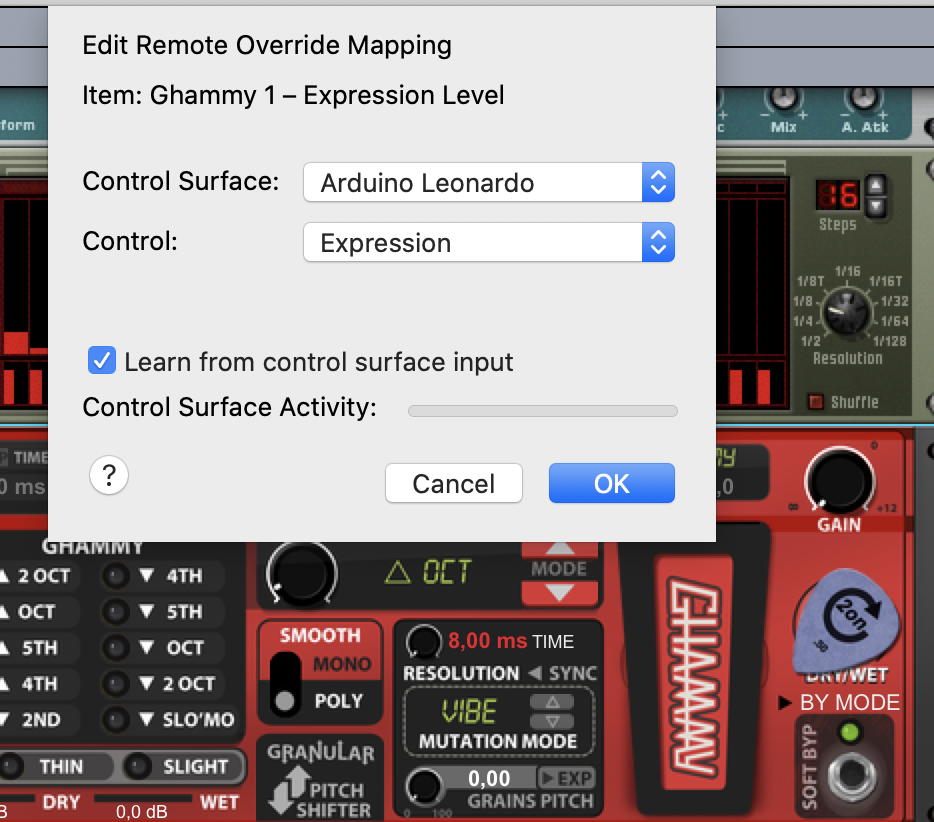
9. Open your Reason app and test your box! Click at any needed device element “Edit Remote override mapping”, check “Learn”, and move any knob, button, switch or your Expression pedal, and it must be recognised under name of your ARDUINO model:
That is all!!! Now you can customise your box as midi controller for personal needs. Its now not just a Expression midi -> usb converter. Its now midi controller.
Personal thank you for KUASSA, ARDUINO community and anybody who build own controller/converter.
WE HIGLY RECOMMEND TO YOU USE ANY EXTERNAL EXPRESSION MIDI PEDAL WITH OUR GHAMMY HARM/PITCH SHIFTER.
Foot controller + few knobs, buttons or switchs really helpful in situations when you already have midi controllers.